How to Create a Fillable Form in Word: The Complete Guide
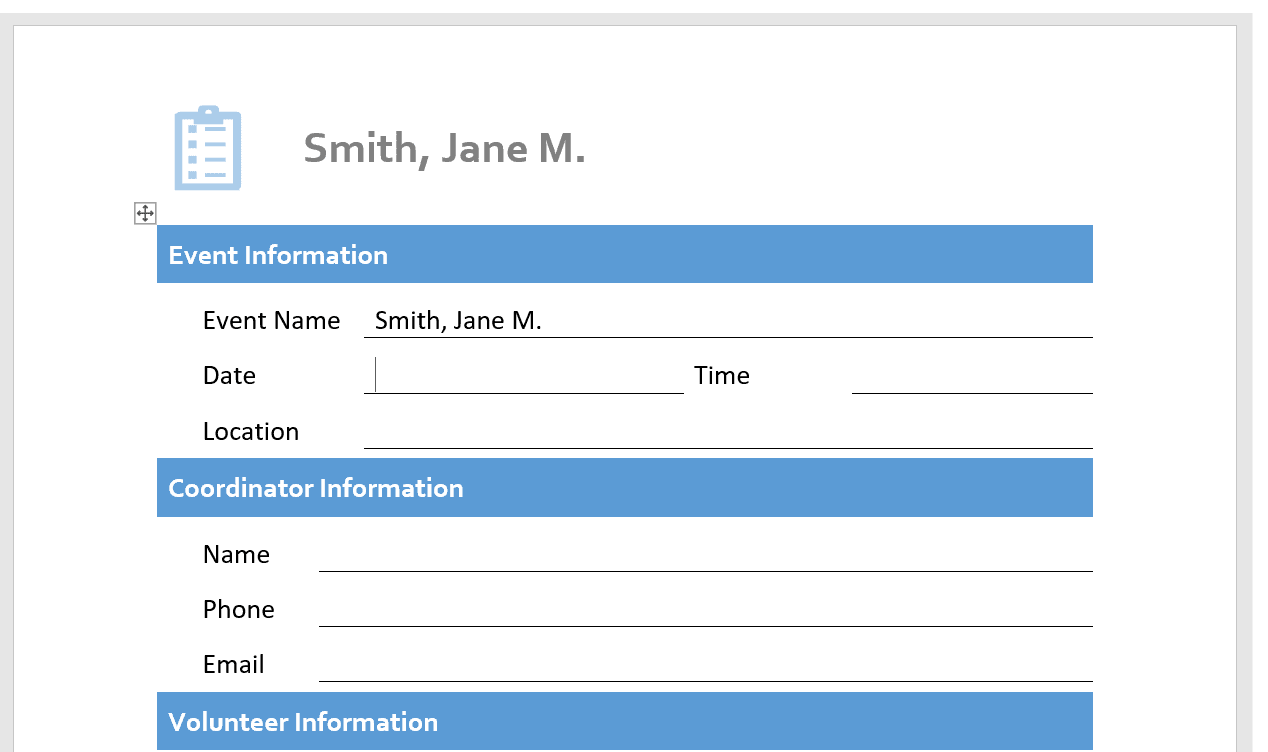
Creating a fillable form in Microsoft Word lets you collect information without requiring recipients to edit the entire document manually.
Quick Answer: How to Create a Fillable Form in Word
To create a fillable form in Word:
- Open Microsoft Word
- Enable the Developer tab
- Turn on Design Mode
- Insert fillable fields
- Customize field settings
- Restrict editing
- Save and share the form
Step-by-Step: How to Create a Fillable Form in Word
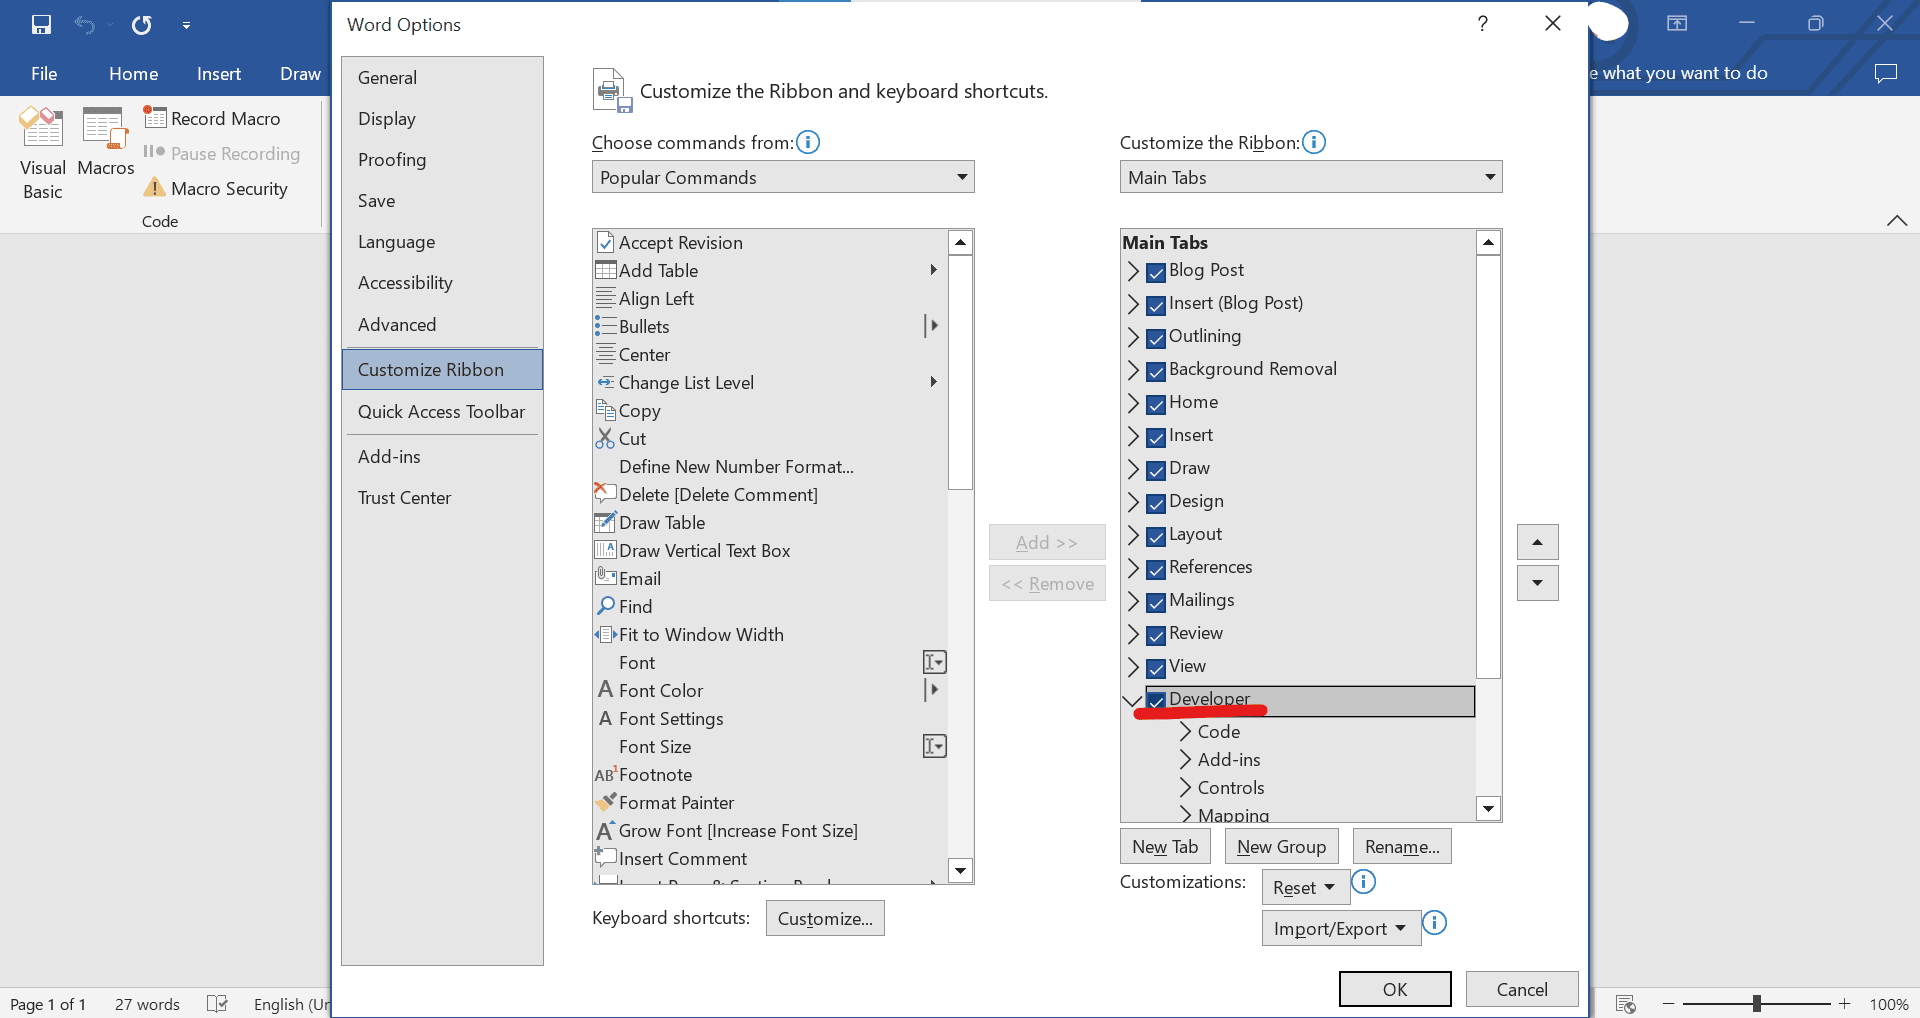
Step 1: Enable the Developer Tab in Word
The Developer tab contains the tools needed to create fillable fields in Word.
To enable it:
- Open Microsoft Word
- Click File
- Select Options
- Click Customize Ribbon
- Under “Main Tabs,” check Developer
- Click OK
You should now see the Developer tab in the top ribbon.
Step 2: Start a New Form Template
Open a blank Word document or use an existing template that you want to make fillable.
If you plan to reuse the form multiple times, consider saving it as a template later.
Step 3: Turn On Design Mode
Open the Developer tab and click Design Mode.
Design Mode allows you to insert and edit fillable fields inside the document.
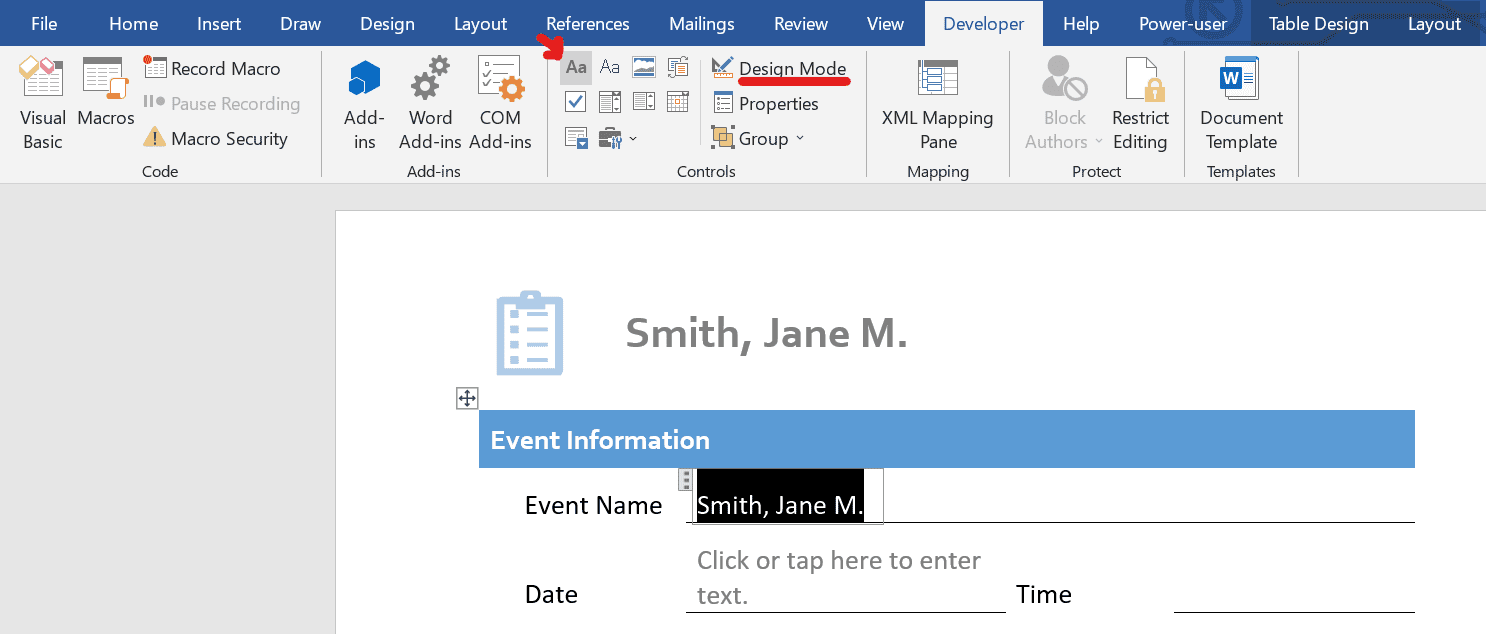
Step 4: Add Fillable Fields in Word
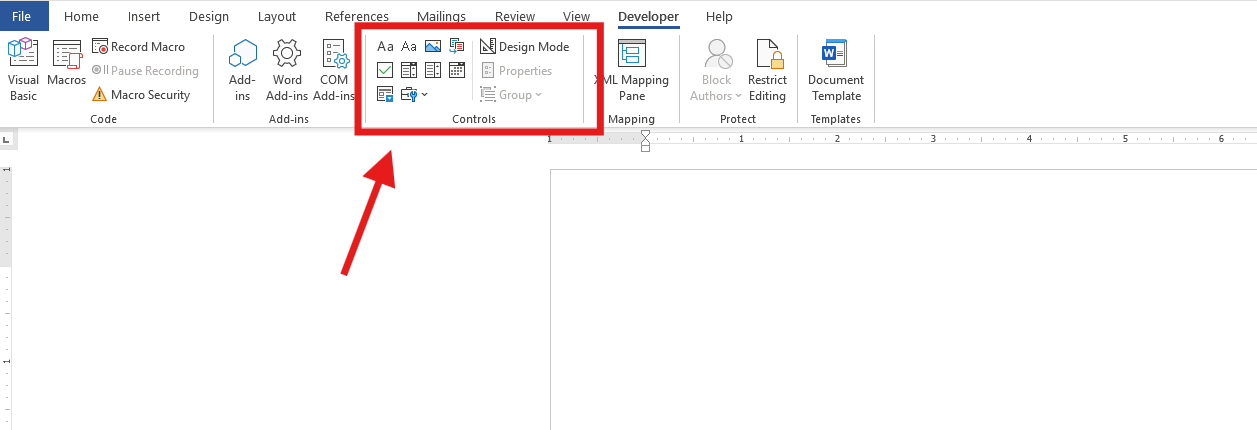
You can now insert different types of fillable fields depending on the information you want to collect.
Add a Text Field
Use a text field when users need to type information such as names, addresses, or comments.
- Place your cursor where you want the field
- Open the Developer tab
- Select either:
- Plain Text Content Control
- Rich Text Content Control
Plain Text vs. Rich Text
- Plain Text allows simple text input only
- Rich Text supports formatting like bold or italics
Add a Checkbox
Checkboxes are useful for yes/no questions or multiple selections.
To insert a checkbox:
- Place your cursor where needed
- Click Check Box Content Control
Add a Dropdown List
Dropdown menus help standardize responses and reduce manual entry errors.
To create one:
- Insert a Dropdown List Content Control
- Click Properties
- Add your list options
Example dropdown uses:
- Department selection
- Country lists
- Appointment types
Add a Date Picker
Date pickers allow users to select dates from a calendar interface.
- Place your cursor
- Click Date Picker Content Control
This is useful for:
- Applications
- Contracts
- Booking forms
- HR documents

Step 5: Customize Field Properties
Each fillable field in Word has customizable settings.
Select a field and click Properties to:
- Rename the field
- Add placeholder text
- Lock editing
- Set formatting rules
- Add dropdown choices
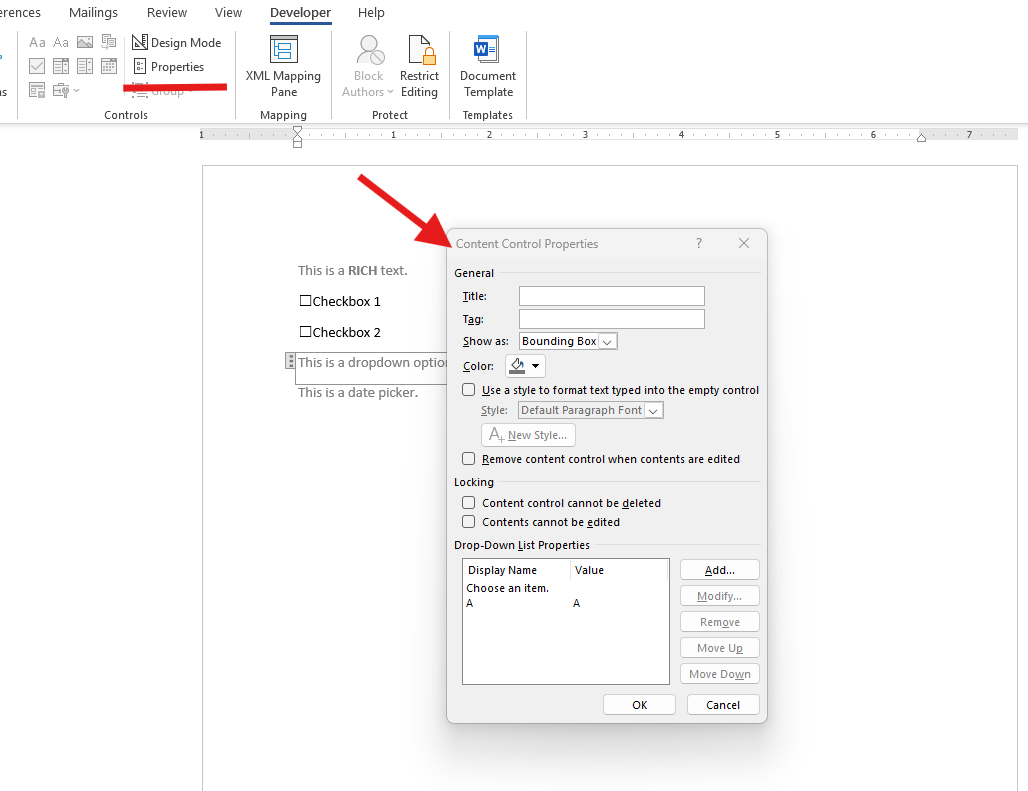
Customizing properties makes your form easier to use and more professional.
Step 6: Add a Signature Line in Word
If you want users to sign the document, you can insert a signature field.
To add a signature line:
- Place your cursor where the signature should appear
- Open the Insert tab
- Click Signature Line
- Fill out the signer details

Important Note: Word Signature Lines Are Not Electronic Signatures
Microsoft Word includes a built-in signature line, but it's important to understand what it can and can't do.
A Word signature line simply indicates where someone should sign a document. If you're sending documents to clients, employees, or customers, it doesn't provide the same experience as a dedicated electronic signature platform.
For example, Word signature lines:
- Usually require recipients to download the document
- May not work consistently across different devices
- Can create compatibility issues when documents are shared
- Don't include document tracking or signing workflows
If you need to collect legally binding electronic signatures online, a dedicated eSignature platform like Fill provides a faster and more streamlined experience.
Word Signature Line vs. Electronic Signature
If you only need to indicate where someone should sign, a Word signature line may be enough. However, if you're collecting signed documents from clients, employees, or customers, Fill makes it easy to send documents, collect legally binding eSignatures, and track every signature from one place.
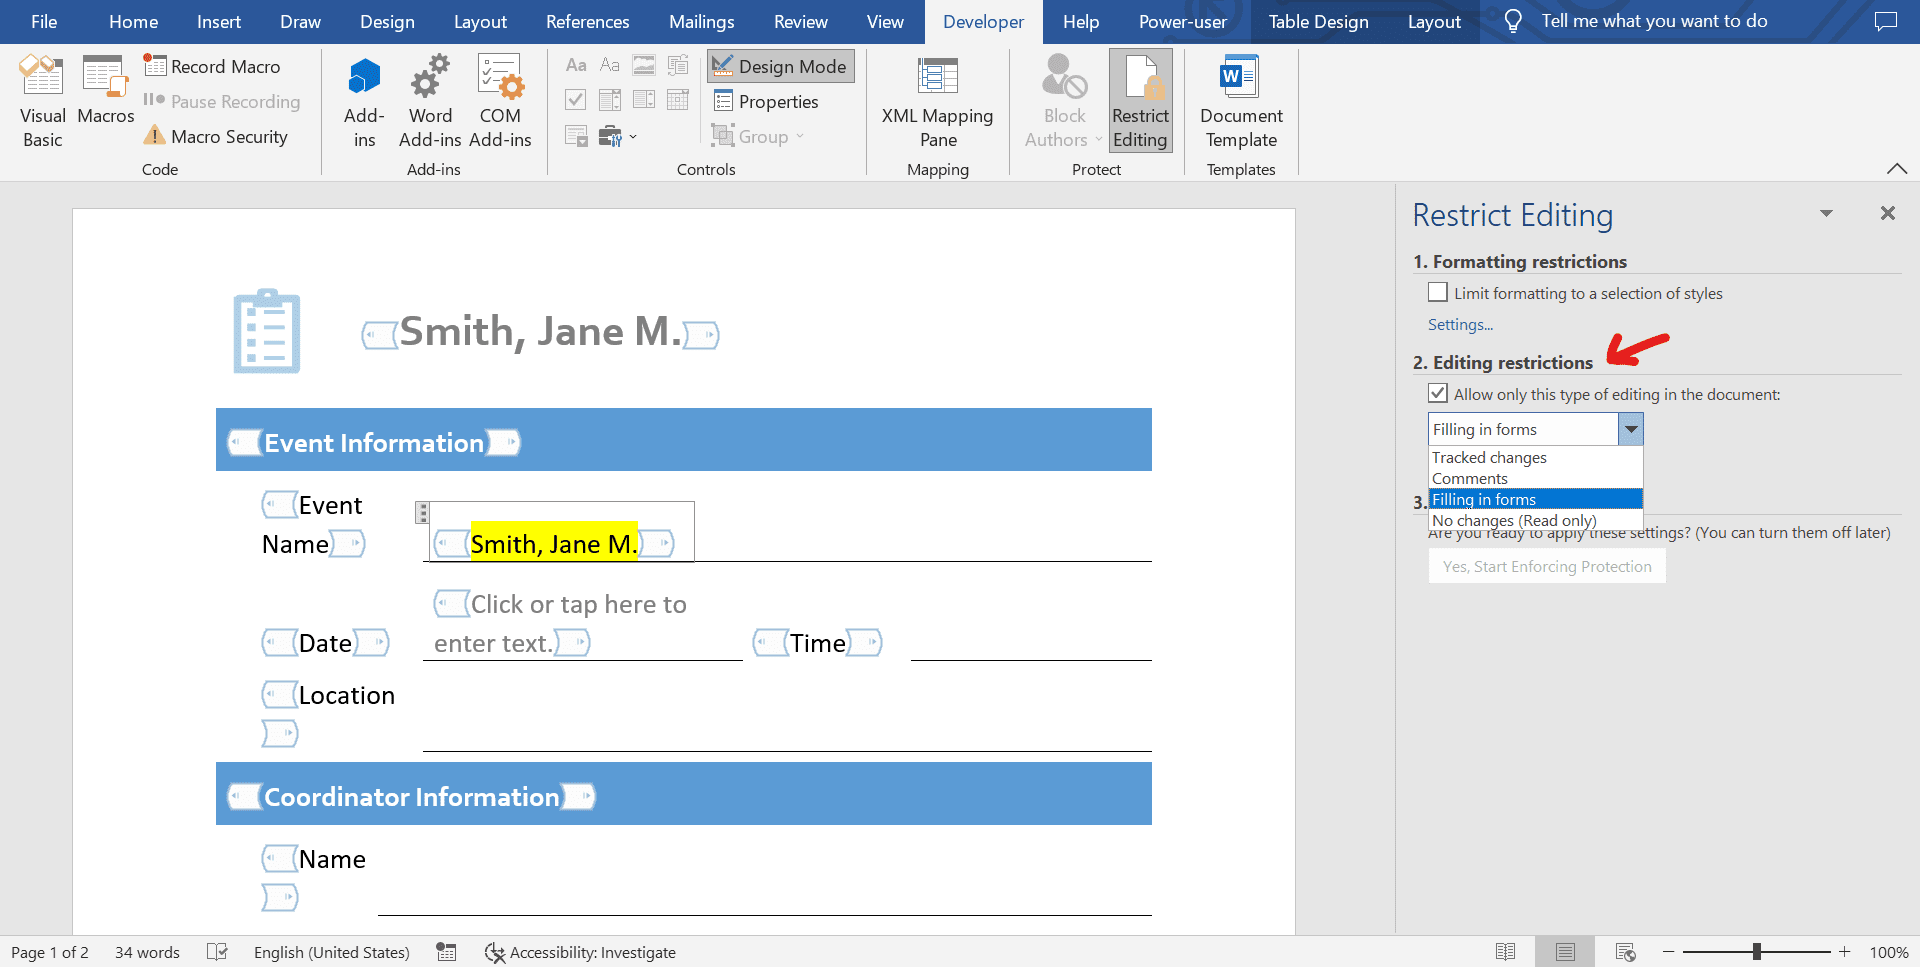
Step 7: Restrict Editing in the Form
To prevent users from accidentally changing the layout of your form:
- Open the Developer tab
- Click Restrict Editing and go to Editing Restrictions.
- Select “Filling in forms” in the dropdown.
- Click Yes, Start Enforcing Protection
This locks the document structure while still allowing form completion.
Step 8: Save the Fillable Form
Once your form is complete:
- Click File
- Select Save As
- Choose a file type
Recommended formats:
.docxfor editable Word forms.pdffor easier sharing
That's it. You're now ready to share the fillable Word form you created via email or direct message. The process is no different from sharing a standard Word document.
Is Microsoft Word the Right Tool for Fillable Forms?
Microsoft Word is a good choice for creating simple fillable forms, especially if everyone who needs to complete the form already uses Microsoft Word. It works well for internal documents, printable forms, or one-time templates that don't require collaboration.
However, Word has limitations when you're sending forms to clients, customers, or employees. Sharing documents by email, tracking responses, and collecting legally binding electronic signatures can quickly become time-consuming.
The table below can help you decide whether Word is the right option for your needs.
Whether you choose Word or an online form builder depends on how you plan to use your forms. If you only need a simple document that stays within your organization, Word is often enough. But if your workflow involves collecting information and signatures from other people, an online solution like Fill can help streamline the entire process.
Common Fillable Forms You Can Create in Word
Once you've learned how to create a fillable form in Word, you can use the same process to build many different types of documents. Simply customize the fields to match the information you need to collect.
Some common examples include:
Employee Onboarding Forms
Collect new hire information such as contact details, emergency contacts, tax information, and company acknowledgements.
Client Intake Forms
Gather customer information before consultations, appointments, or new projects using text fields, dropdown menus, and checkboxes.
Job Application Forms
Create application forms that allow candidates to enter their personal information, work history, education, and references.
Registration Forms
Build event registrations, membership applications, or volunteer sign-up forms that can be completed digitally.
Contracts and Agreements
Add fillable fields for names, addresses, dates, and other required information before collecting signatures.
Feedback and Survey Forms
Create simple questionnaires using text fields, checkboxes, and dropdown lists to collect responses from employees or customers.
Although Microsoft Word works well for these types of forms, organizations that frequently send documents for completion often choose online form builders to simplify sharing, tracking, and electronic signatures.
How to Create a Fillable Form Template in Word
If you plan to reuse the same form repeatedly, save it as a template.
To do this:
- Click File
- Select Save As
- Choose Word Template (.dotx)
This allows you to create reusable forms for:
- Employee onboarding
- Contracts
- Client intake forms
- Applications
Saving your form as a template works well if you'll be creating similar documents repeatedly. However, if you regularly send forms to clients or collect responses online, you may find that managing Word files manually becomes time-consuming.
Common Problems With Fillable Forms in Word
While Word forms work well for basic use cases, they also have limitations.
Formatting Issues
Different versions of Microsoft Word don't always display forms the same way. Fields can shift, formatting may break, and recipients using older versions of Word may experience compatibility issues.
Limited Mobile Experience
Although Word documents can be opened on mobile devices, completing fillable forms isn't always a smooth experience. Small screens and inconsistent app support can make forms difficult to fill out accurately.
Sharing Challenges
To complete a Word form, recipients typically need to:
- Download the document
- Open it in Microsoft Word
- Complete the form
- Save the file
- Email it back
This process works, but it can become difficult to manage when you're collecting forms from multiple people.
No Built-In eSignature Workflow
Word includes a signature line, but it doesn't provide a complete electronic signature workflow. If you need legally binding eSignatures, document tracking, or automated reminders, you'll need a dedicated eSignature solution.
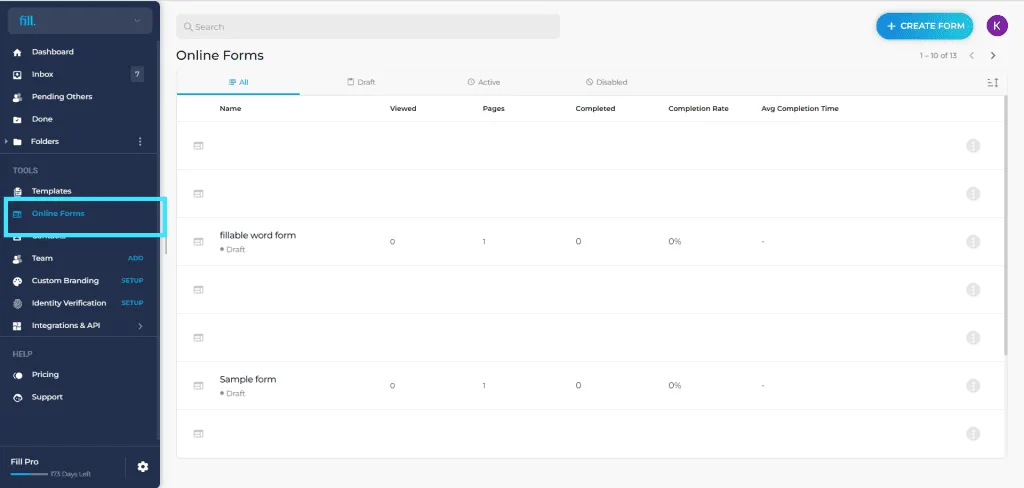
Microsoft Word vs. Fill: Which Is Better for Fillable Forms?
Both Microsoft Word and Fill let you create fillable forms, but they're designed for different workflows. Word is ideal for creating simple documents that are completed offline, while Fill is built for securely collecting information and electronic signatures online.
If you're deciding which tool is right for you, here's a quick comparison:
Microsoft Word is a great choice for creating simple fillable documents, especially if everyone involved already uses Word. However, if you regularly send forms to clients, employees, or customers, Fill offers a faster and more streamlined way to create, send, sign, and manage documents from start to finish.
Frequently Asked Questions
Can you create fillable fields in Word?
Yes. Microsoft Word includes built-in content controls that let you create fillable fields such as text boxes, checkboxes, dropdown lists, date pickers, and rich text fields. These controls are available from the Developer tab, which you'll need to enable before creating a fillable form.
Once you've added your fields, you can customize their properties and restrict editing so recipients can complete the form without changing the document's layout.
Why can’t I see the Developer tab in Word?
The Developer tab is hidden by default in Microsoft Word. To enable it:
- Click File.
- Select Options.
- Choose Customize Ribbon.
- Under Main Tabs, check Developer.
- Click OK.
The Developer tab contains the tools needed to insert text fields, checkboxes, dropdown lists, and other fillable form controls. Without it, you won't be able to create a true fillable form.
Can I create a fillable form in Word without the Developer tab?
No. The Developer tab is required to insert interactive form controls such as text fields, checkboxes, dropdown lists, and date pickers.
If you only need a document that people can print or edit manually, you can create a standard Word document without the Developer tab. However, creating a true fillable form requires the Developer tools.
Can I convert a Word document into a fillable PDF?
Yes, but with limitations. Saving a Word document as a PDF preserves the document's appearance, but the fillable fields don't always transfer correctly. Whether they remain interactive depends on how the PDF is created and the software recipients use to open it.
If you need a reliable fillable PDF that works consistently across devices, consider creating the document directly with a dedicated PDF or eSignature solution.
Can I make a Word document fillable but not editable?
Yes. After adding your fillable fields, you can use Word's Restrict Editing feature to lock the document while still allowing users to complete the form.
To do this:
- Open the Developer tab.
- Click Restrict Editing.
- Under Editing Restrictions, choose Filling in forms.
- Select Yes, Start Enforcing Protection.
This allows recipients to complete the fillable fields without modifying the rest of the document.
Are Word forms legally binding?
A fillable Word form can be used as part of a legally valid agreement, but the built-in Word signature line isn't the same as a secure electronic signature.
If you need legally binding electronic signatures, signer authentication, document tracking, or an audit trail, you'll typically need a dedicated eSignature platform. These features help support compliance and make it easier to manage documents throughout the signing process.
How do I create a fillable form in Word 365?
The process is essentially the same as in other recent versions of Microsoft Word. In Word 365, you'll first enable the Developer tab, then use it to insert fillable fields such as text boxes, checkboxes, dropdown lists, and date pickers. Once your form is complete, you can restrict editing to prevent users from changing the document's layout before sharing it.
Because Word 365 is regularly updated, some menu layouts may vary slightly, but the overall process remains the same.
What's the difference between a Word form and a fillable PDF?
A Word form is designed to be completed within Microsoft Word, while a fillable PDF can typically be opened and completed using a wider range of PDF readers across different devices.
Both formats can include fillable fields, but they serve different purposes. Word forms are often used for internal workflows where everyone has Microsoft Word, while fillable PDFs are generally easier to share with external recipients because they preserve formatting more consistently.
If you regularly send forms to clients, employees, or customers, an online document platform like Fill can streamline the process by letting recipients complete forms, electronically sign documents, and submit everything online without downloading Word files.


View our Privacy Policy for more info.