Streamline Your Document Workflow with eSignatures on HubSpot
Optimize your HubSpot CRM with Fill—effortlessly create, eSign, and track sales documents. Whether you’re drafting contracts one by one or in batches, experience seamless contract creation and gain real-time insights into prospect engagement.
How to set up HubSpot eSignature
Explore easy steps to configure your HubSpot CRM for seamless document eSigning with Fill.
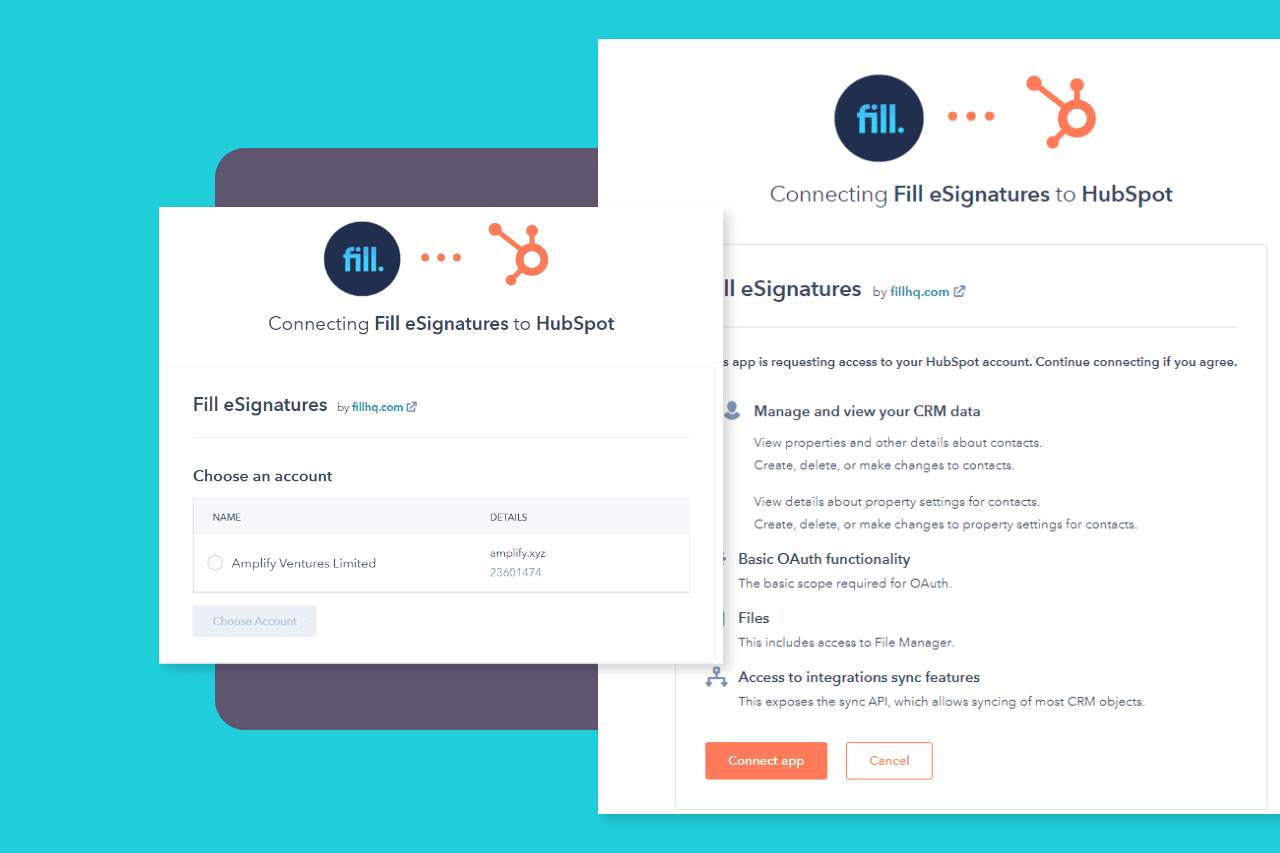
Choose the Hubspot account you want to connect with Fill and authorize the sync.
Confirm
On Hubspot, go to Reporting > DataManagement > Integration to see Fill integration.
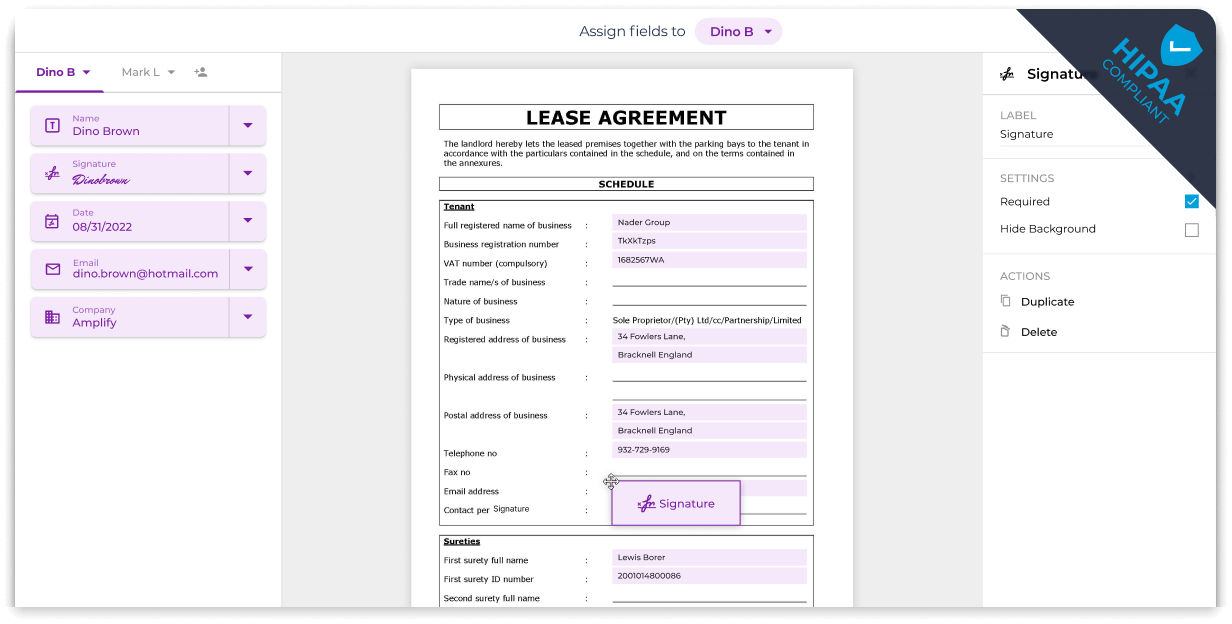
Create & eSign documents within Hubspot
Seamlessly generate documents or choose templates for contacts or companies in your HubSpot database using Fill. Easily incorporate text fields, contact data, and eSignatures on contracts, all within your HubSpot interface.
Gain an instant overview of contract activity on your HubSpot dashboard. Receive timely notifications when signees access, fill out or sign a document and keep track of how swiftly they complete the signing process.
Unify your sales tasks in one efficient app. Your sales team can now seamlessly send eSignature requests, individually or as envelopes, without leaving HubSpot. Transform your HubSpot into a centralized hub for executing and managing deals and leads.
Enhanced security with contact identity verification
Take an extra step in securing your contract documents by allowing only trusted contacts to access them. The HubSpot Fill integration safeguards your business assets by confirming the identity of your signees before they eSign your contracts.