Businesses are constantly seeking methods to improve productivity and team efficiency. Using online forms is one of the solutions you may not have considered yet.
Unlike their paper-based counterparts, online forms don’t get worn out or destroyed by external means. They’re easy to store and retrieve, plus there is little risk of human-initiated error. Online forms also don’t take up physical space, which can be costly for operations.
Take patient intake forms, for example. With online forms, there is no need to tirelessly fill up the required information. This saves valuable time, which is a crucial aspect of healthcare.
To get you started, we’ve gathered several tips for creating better online forms.
Online Forms 101
- What Are Online Forms?
- 5 Benefits of Adopting Online Forms
- 5 Types of Forms That Are Best in an Online Format
- Best Practices for Crafting Online Forms
- 5 Ways to Maximize the Use of Online Forms
What Are Online Forms?
Online forms are electronic documents that facilitate information input, typically through a web browser. The information is collected electronically, making it simple to retrieve and save. An online form can be used for almost any industry.
Information can be organized, tracked, and managed easily with the use of forms online. One can sign up for an event or complete a poll, for instance. Since all the data is stored in one place, you can ensure that no significant details are missed.
It is designed to be filled out by a target audience. Plus, it is easy to use and helps to speed up a variety of business objectives.
5 Benefits of Adopting Online Forms
Below are some of the advantages of using these digital forms:
1. Hassle-free creation
A flexible, easy-to-use, and straightforward solution to collect data that works for teams of all sorts is provided by a fillable online form. This tool gives you the choice to apply a variety of fields, including single, multiple, and matrix text boxes.
2. Accurate and updated information
You can make sure that your team always asks the same question when they use the form in a face-to-face setting. This is essential since it standardizes the customer experience and prevents the possibility of failing to record pertinent information.
3. Robust data security
You can gather data using online forms in a safe and standard manner. When the needed information is retrieved, it is kept securely and made accessible to select users. In contrast to hard copies that might get lost or misplaced, this gives you a greater sense of security that your information is backed up and in good hands.
4. Simplified data collection
Online forms are simpler than paper forms, which makes them easier to complete. Moreover, you can change your settings to receive notifications through email or your phone when someone fills out your online form. You can monitor replies in real time rather than logging in to the form platform to examine them individually.
5. Less paper waste
Do you still send contracts, staff questionnaires, or performance evaluations on paper? It’s time to completely stop using paper. Simplify your workflows and save trees in the process by using online forms.
5 Types of Forms That Work Best in an Online Format
Businesses need the help of online forms to ease data gathering. You can build and utilize online forms as a safe way to digitally acquire and dependably collect the data you need. Some of them are as follows:
1. Customer feedback forms
Businesses can use online forms to collect comments and suggestions from customers. This information serves as the basis for improving services and boosting customer satisfaction.
2. Online surveys
Conduct surveys online by using online forms. Thanks to this, you will be able to effectively and conveniently get information from a large audience.
3. Order placement forms
To make it easier for customers to place orders, you can use online forms on e-commerce sites. This helps save time while making sure that all important information is gathered.
4. Patient intake forms
Fillable online forms can be used in hospitals and medical offices to acquire patient records. This also lessens the risk of mistakes or missing information.
5. Contact information forms
Utilize fillable online forms for collecting visitor information from your site. Doing so helps you obtain all the contact information you need for potential leads.

Best Practices for Crafting Online Forms
There are various methods to make fillable online forms more effective and user-friendly. When designing an online form, use the following tips:
Use templates
You don’t have to spend a lot of time creating your forms. Most online forms can be created without any code at all. You may quickly design one using drag-and-drop tools and templates in online form builders. If you want to add some features, customization is an option.
Collect the right information
Not every piece of information is useful, particularly if it won’t help you achieve your goals. It’s best to focus on the data that you actually need to collect. You can limit your form to ask only for basic identity information such as active email address and full name.
Enable autofill
Save your visitors time by eliminating the need to fill out forms they’ve already filled out. This ensures a faster process, plus there is little room for errors in case they forget information.
Ensure mobile responsiveness
Users tend to use their mobile devices, so it only makes sense to develop mobile-responsive forms. As a rule of thumb, the online form elements must conform to most mobile devices without sacrificing their original format. Another tip is to ensure that the numeric keyboard comes up if the user needs to add their number.
Communicate CTAs clearly
Your CTA, or call to action, is your first attempt to capture the users’ attention. That’s why it makes sense to make it as eye-catching as possible. Your best bet is to communicate what the user will get upon completing the form, such as access to exclusive content or priority booking.
Add meaningful visuals
Empty or text-heavy visuals are boring. As much as possible, you want to keep the users’ attention on your online form. What better way to make any content engaging than to add pleasing and relevant visuals as they complete the form?
5 Ways to Maximize the Use of Online Forms
Online forms provide ease and convenience you can’t get from traditional paper forms. However, it can still be a drag to circulate among teams if you can’t unleash its full potential.
Here are five ways to maximize the use of online forms:
1. Arrange meetings
Don’t waste your time exchanging emails back and forth to arrange meetings. You can book meetings, communicate your availability, and add guests to events directly in your form. This is possible with the integration of online form options into calendar plugins and applications like Google Calendar, iCalendar, and Outlook.
2. Consolidate data analysis
When using an online form, you don’t have to enter data into a spreadsheet manually. Every time you log in, you can monitor your form analytics through the use of platforms that provide powerful, data-crunching analytics.
3. Expedite data entry
Instead of sending out the most recent spreadsheet through email, your online form can automatically gather the latest data input. This can then be exported to Excel and Word and shared with team members. Additionally, you can choose particular approvers for a form, which speeds up the submission and approval procedure.
4. Distribute fewer emails
Use online forms to facilitate communication and to cut down on the amount of time you spend on email. This is also necessary to avoid frequent failures to attach a file to your email. Also, it saves all the information you need in one place and streamlines the information for the transfer process.
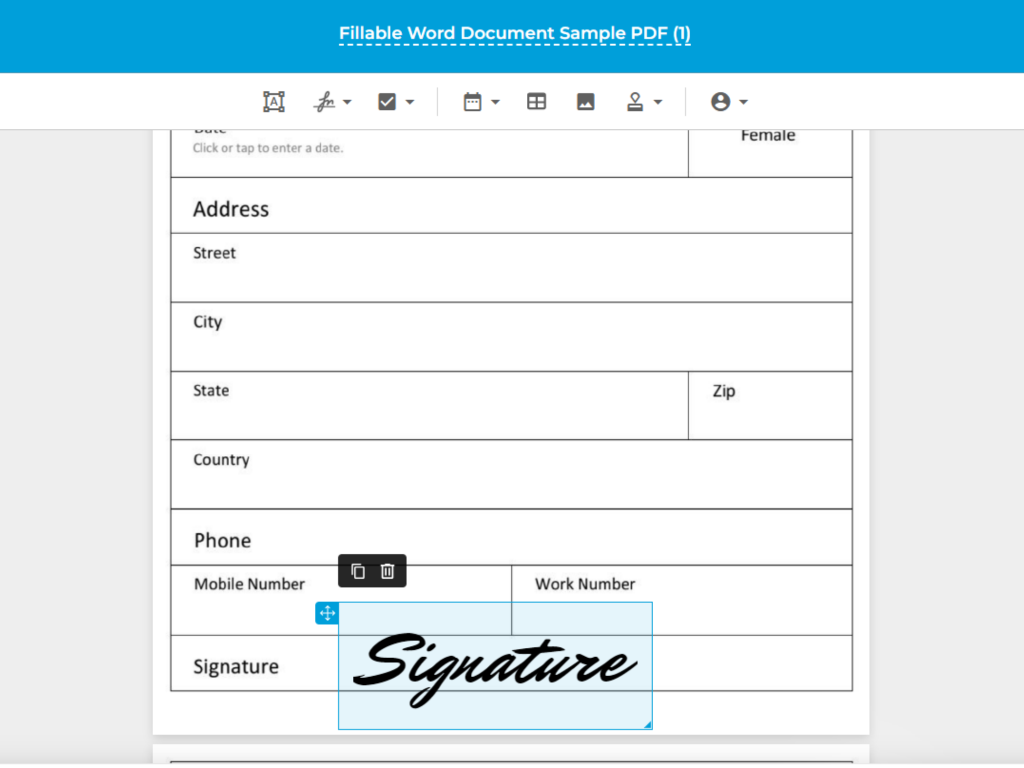
5. Collect electronic signatures
Add eSignature fields to your online forms instead of manually signing, printing, and scanning them back into your system. You’ll be amazed at how fast you can complete contracts and agreements with this approach.
One of the best ways to collect eSignatures is through Fill, a platform where you can create forms online and have them signed in no time.
Fill: Online Forms for Better Productivity
Start using online forms to improve your customer relationship. Elevate your sales by acknowledging product-related concerns, responding to inquiries, and fulfilling requests promptly.
Through Fill, you can create online forms and insert eSignatures in PDFs using your laptop, desktop, or mobile device. Our integrated platform solution allows you to stay on top of your tasks online.
Use Fill as part of a centralized information-gathering system that is accurate and accessible. Our top-notch security ensures the integrity of all information collected. You can also rest assured that Fill is HIPAA-compliant.
Sign up for free, request a demo, and be productive with us.